How to add signature to cURL Requests?
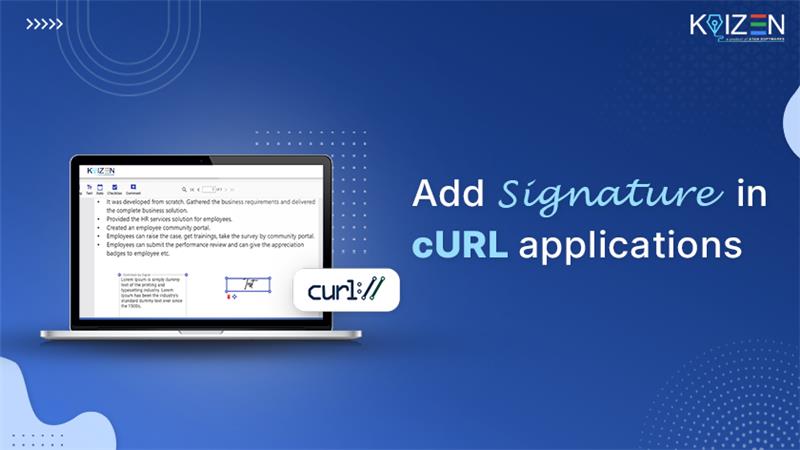
Tired of clicking through UI dashboards just to get a document signed? With KAiZEN’s powerful eSignature API and the versatility of cURL, you can streamline the entire process—securely, efficiently, and right from your terminal. This tutorial is your shortcut to smarter document workflows.
Whether you’re building scripts for document automation or testing eSignature flows during development, this guide will show you how to add signature to cURL Requests using KAiZEN’s APIs. From uploading files to triggering signature requests, you’ll learn how to create legally binding, secure, and streamlined signing experiences—all from your terminal.
How to add Signatures into cURL Applications:
Step 1:
Identify the users which need to sign the document along with their levels or order hierarchy. Order means the sequence in which the signers will sign the document. A person with Order 2 will sign only after the person with order 1 has signed.
Let’s define the below two users which the order of signing.
Signer Information
| Signer Name | Order | Signer Email |
|---|---|---|
| Signer 1 | 1 | signer1@gmail.com |
| Signer 2 | 2 | signer2@gmail.com |
-
Step 2:
Need to make a secure HTTP Callout to call the KAiZEN “Initiate Sign API” request as per the below details:
HTTP Request Parameters
Parameters Name Value Content-Type application/json Method POST Endpoint https://fa-kaizen-prod.azurewebsites.net/api/Sign/RequestStr?code=RTa1A0GW5Yl92OF54-73lRqglLFCt_0pVcg86hWf1EjtAzFuNROcdA== Body JSON Body with parameters Request Body Parameters
Parameters Name Description Required? docContent Base64 Content for the PDF File Yes docName Name of the File Yes appToken Unique Code to initiate the request Yes requesterEmail Email address of the person initiating the request Yes requesterName Name of the person initiating the request Yes description Describes the document NO signers An array of the signers who needs to sign the document in the pre-defined order. Yes CallBackURL CallbackURL defines the url on which the KAiZEN should send a response once all the signers signs the document. It can be webservice url of Salesforce or any external page.
Eg: https://duumy.my.salesforce- sites.com/services/apexrest/KaizenCallbackURL/No newRequestEmailSubject Describes the email subject No requesterMessage Describes the prompt eSignature field No docDescription Describes the document No -
Step 3:
Curl Code Sample for Integration
							curl --location 'https://fa-kaizen-staging.azurewebsites.net/api/Sign/RequestStr?code=mLgEBTpi9dfooQ6TB9gc7sa4qiIuuxmqQYoTx8nQQ1StAzFu93g06A%3D%3D' \
--header 'Content-Type: application/json' \
--data-raw '{
    "docContent":"base 64 content of the document",
    "docName": "KaizenTest.pdf",
    "appToken": "xxxxxxxx-xxxxx (Add App Token shared by KAiZEN Team)",
    "requesterEmail": "xyz@gmail.com",
    "requesterName": "XYZ",
    "requesterPhone": "xxxxx-xxx-xxxx",
    "description" :"",
    "newRequestEmailSubject":"You have a document to sign",
    "requesterMessage": "Kindly eSign your KAiZEN Test PDF",
    "signers": [
        {
            "signerEmail": "signer1@gmail.com",
            "signerName": "Signer1",
            "signerPhone": "xx-xxx-xxxx-xxx",
            "order": "1",
            "signerRole": "signer"

        },


	{
            "signerEmail": "signer2@gmail.com",
            "signerName": "Signer2",
            "signerPhone": "xxx-xxx-xxxx-xxxx",
            "order": "2",
            "signerRole": "reviewer"

        }
    ],

    "docDescription": "Base 64 string based test doc",
    "callbackurl": ""
}'
Sample HTTP Response:
								{
“FailRules”: [],
“Data”: {
“SignRequestId”: “01HV6MEARQD3X8ZXXX5FR3YDB8”,
“RequestNo”: “KAiZEN-118”
}
}
Once the request is submitted, it will send a response with the request Id. If the callback url is configured, it will send a signed copy of the document on the defined url, once all the signers will sign and review the document.
Once the request is sent out to the signers, each signer will receive an email to sign the document in the order as defined in the request.
How KAiZEN eSign Works
-
Check Your Inbox
The signer will receive an email from KAiZEN with a prompt to sign the document.

-
Click to Start Signing
Inside the email, click the “Sign here” button. This opens the document in the secure KAiZEN signing editor.

-
Sign the Document
After clicking on the “Sign Here” button. You’ll get a popup where you can choose the following methods to eSign:
- Initials
- Draw your signature
- Upload an image of your signature
- Recently Used Signs

-
Submit and Done
Once you’ve placed your signature, click Submit. The next signer in the sequence will then be notified.

-
After All Signers Complete
Once every signer has completed the process:
- Each signer will receive an email with the final signed document.
- If a callback URL was configured, a copy of the signed document will be automatically sent to that system (e.g., Java or your application).

Conclusion
Integrating Signatures with cURL using KAiZEN is quick, secure, and efficient. It streamlines your document workflows without the need for complex coding—making digital signing easy from the command line.
Sign up for Free
Trial today!
Try KAiZEN for free
Tired of clicking through UI dashboards just to get a document signed? With KAiZEN’s powerful eSignature API and the versatility of cURL, you can streamline the entire process—securely, efficiently, and right from your terminal. This tutorial is your shortcut to smarter document workflows.
Whether you’re building scripts for document automation or testing eSignature flows during development, this guide will show you how to add signature to cURL Requests using KAiZEN’s APIs. From uploading files to triggering signature requests, you’ll learn how to create legally binding, secure, and streamlined signing experiences—all from your terminal.
How to add Signatures into cURL Applications:
Step 1:
Identify the users which need to sign the document along with their levels or order hierarchy. Order means the sequence in which the signers will sign the document. A person with Order 2 will sign only after the person with order 1 has signed.
Let’s define the below two users which the order of signing.
Signer Information
| Signer Name | Order | Signer Email |
|---|---|---|
| Signer 1 | 1 | signer1@gmail.com |
| Signer 2 | 2 | signer2@gmail.com |
-
Step 2:
Need to make a secure HTTP Callout to call the KAiZEN “Initiate Sign API” request as per the below details:
HTTP Request Parameters
Parameters Name Value Content-Type application/json Method POST Endpoint https://fa-kaizen-prod.azurewebsites.net/api/Sign/RequestStr?code=RTa1A0GW5Yl92OF54-73lRqglLFCt_0pVcg86hWf1EjtAzFuNROcdA== Body JSON Body with parameters Request Body Parameters
Parameters Name Description Required? docContent Base64 Content for the PDF File Yes docName Name of the File Yes appToken Unique Code to initiate the request Yes requesterEmail Email address of the person initiating the request Yes requesterName Name of the person initiating the request Yes description Describes the document NO signers An array of the signers who needs to sign the document in the pre-defined order. Yes CallBackURL CallbackURL defines the url on which the KAiZEN should send a response once all the signers signs the document. It can be webservice url of Salesforce or any external page.
Eg: https://duumy.my.salesforce- sites.com/services/apexrest/KaizenCallbackURL/No newRequestEmailSubject Describes the email subject No requesterMessage Describes the prompt eSignature field No docDescription Describes the document No -
Step 3:
Curl Code Sample for Integration
							curl --location 'https://fa-kaizen-staging.azurewebsites.net/api/Sign/RequestStr?code=mLgEBTpi9dfooQ6TB9gc7sa4qiIuuxmqQYoTx8nQQ1StAzFu93g06A%3D%3D' \
--header 'Content-Type: application/json' \
--data-raw '{
    "docContent":"base 64 content of the document",
    "docName": "KaizenTest.pdf",
    "appToken": "xxxxxxxx-xxxxx (Add App Token shared by KAiZEN Team)",
    "requesterEmail": "xyz@gmail.com",
    "requesterName": "XYZ",
    "requesterPhone": "xxxxx-xxx-xxxx",
    "description" :"",
    "newRequestEmailSubject":"You have a document to sign",
    "requesterMessage": "Kindly eSign your KAiZEN Test PDF",
    "signers": [
        {
            "signerEmail": "signer1@gmail.com",
            "signerName": "Signer1",
            "signerPhone": "xx-xxx-xxxx-xxx",
            "order": "1",
            "signerRole": "signer"

        },


	{
            "signerEmail": "signer2@gmail.com",
            "signerName": "Signer2",
            "signerPhone": "xxx-xxx-xxxx-xxxx",
            "order": "2",
            "signerRole": "reviewer"

        }
    ],

    "docDescription": "Base 64 string based test doc",
    "callbackurl": ""
}'
Sample HTTP Response:
								{
“FailRules”: [],
“Data”: {
“SignRequestId”: “01HV6MEARQD3X8ZXXX5FR3YDB8”,
“RequestNo”: “KAiZEN-118”
}
}
Once the request is submitted, it will send a response with the request Id. If the callback url is configured, it will send a signed copy of the document on the defined url, once all the signers will sign and review the document.
Once the request is sent out to the signers, each signer will receive an email to sign the document in the order as defined in the request.
How KAiZEN eSign Works
-
Check Your Inbox
The signer will receive an email from KAiZEN with a prompt to sign the document.
-
Click to Start Signing
Inside the email, click the “Sign here” button. This opens the document in the secure KAiZEN signing editor.
-
Sign the Document
After clicking on the “Sign Here” button. You’ll get a popup where you can choose the following methods to eSign:
- Initials
- Draw your signature
- Upload an image of your signature
- Recently Used Signs
-
Submit and Done
Once you’ve placed your signature, click Submit. The next signer in the sequence will then be notified.
-
After All Signers Complete
Once every signer has completed the process:
- Each signer will receive an email with the final signed document.
- If a callback URL was configured, a copy of the signed document will be automatically sent to that system (e.g., Java or your application).
Conclusion
Integrating Signatures with cURL using KAiZEN is quick, secure, and efficient. It streamlines your document workflows without the need for complex coding—making digital signing easy from the command line.